Craft Basket
Popsicle Stick Puzzle Basket
A simple homemade puzzle basket where children draw one picture across connected sticks, number each piece, and then mix them up to solve their own creation.
Ages 3-65 min prep
A simple homemade puzzle basket where children draw one picture across connected sticks, number each piece, and then mix them up to solve their own creation.
Set up the basket the night before: place the popsicle sticks, masking tape, marker, and colored pencils in a small basket so the invitation is ready in the morning.
Invite your child to count out 6 sticks (or 4 for a first try) and line them up side by side on the table, touching edge to edge like a tiny fence.
Help them lay one strip of masking tape across the back of the sticks, pressing gently so they stay together but can still be flipped forward like one solid rectangle.
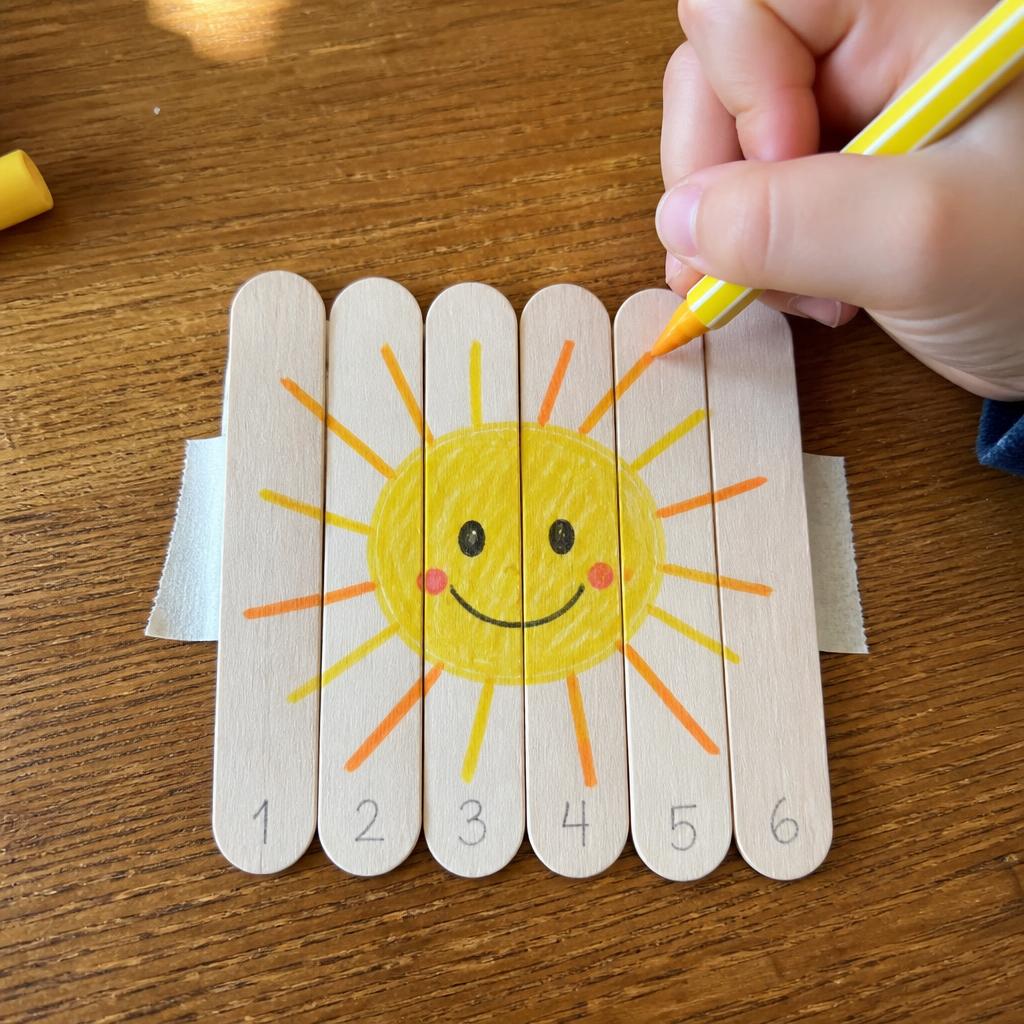
Turn the sticks face up. Ask your child to draw one simple picture that stretches across all the sticks — a sun, a house, a tree, a smiling face, or a wavy path. Remind them to draw across the seams so each stick holds part of the picture.
Once the outline is done, let them color it in with pencils or crayons. Keep the shapes simple; big blocks of color make the puzzle easier to put back together.
When the drawing is finished, help your child number the sticks from left to right: 1, 2, 3, 4, 5, 6. The numbers are a quiet helper — they make it much easier to put the picture back in the right order when the sticks get mixed up. For younger children, write the numbers yourself and say each one out loud as you go.
Carefully peel off the masking tape from the back. Now each stick is its own puzzle piece with a number and a slice of the picture.
Mix the sticks up on the table and challenge your child to put the picture back in order. They can use the numbers, the picture edges, or both.
When the puzzle is solved, store the sticks in the basket. The next time they play, they can rebuild it or make a brand new puzzle on the same sticks.
For age 3, start with just 4 sticks and a very simple picture. For age 5-6, try 8 sticks and a more detailed scene. If your child gets frustrated, leave the numbers visible — they are a gentle scaffold, not cheating. This activity also builds number sequencing and visual-spatial thinking without feeling like a lesson.