Home/Nature Basket/Mud Building Basket
Mud Building Basket
Nature Basket

Mud Building Basket

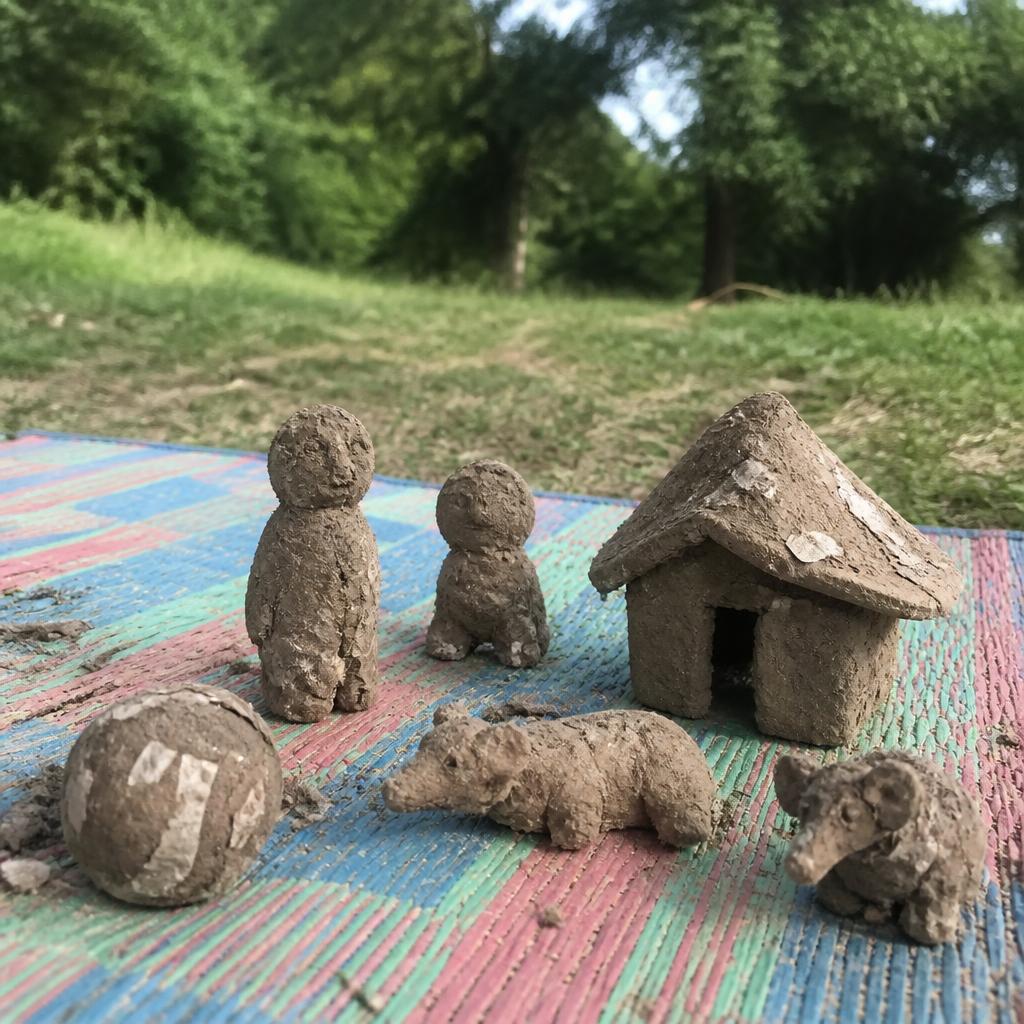
A wild, sensory nature basket where kids make their own building mud from water, stones, paper, and soil — then sculpt creations that harden like real clay.

This page may contain affiliate links. I earn a commission from qualifying purchases.

Ages 3-615 min plus drying prep
The shake bottle with water, stones and torn paper.
Mixing the mud until it holds together.
Mud creations drying in the sun.

What you'll need

  • One empty plastic bottle with a tight-fitting cap (500 ml–1 L works well)
  • Water from a stream, creek, or rain barrel — about one-third of the bottle
  • 10 small stones, pebbles, or gravel pieces
  • 5 sheets of scrap paper, newspaper, or old tissue paper, torn into small pieces
  • A patch of soil or garden dirt for mixing
  • A shallow tray, cardboard, or brown paper for sculpting
  • A small bowl of water for rinsing hands
  • An old towel or rag for cleanup
  • Acrylic paints
  • Plastic glue (PVA)

Underlined items are affiliate links — if you buy through them I earn a small commission, at no extra cost to you 🙏

How to make it

  1. 1

    Head outside and gather your materials together: the empty bottle, stones, torn paper, and a little stream or rain water.

  2. 2

    Fill the plastic bottle about one-third full with water.

  3. 3

    Drop the 10 small stones into the bottle, then add the torn paper pieces.

  4. 4

    Screw the cap on tightly and invite your child to shake the bottle with both hands. Shake vigorously for several minutes until the paper breaks down into a pulpy mush and the water looks cloudy.

  5. 5

    Pour the pulpy mixture out onto a patch of bare soil or into a shallow tray of dirt.

  6. 6

    Remove the stones and set them aside — they have done their job of helping mash the paper.

  7. 7

    Use your hands to mix the paper pulp and soil together thoroughly. Add a little more water or dirt until the mud feels thick and moldable, like stiff cookie dough.

  8. 8

    Place the mud onto a piece of cardboard or brown paper and let your child sculpt: pinch pots, little bricks, bowls, or simple animal shapes.

  9. 9

    Leave the creations outside in the sun to dry. They will harden and become surprisingly strong as they dry over a day or two.

  10. 10

    Once the sculpture is completely dry, brush on a thin layer of plastic glue diluted with a tiny splash of water. This seals the mud and paper pulp so they do not soak up the paint. Let the glue dry fully.

  11. 11

    Paint the sealed sculpture with acrylic paints. The colors will look brighter and last longer because the sealed surface no longer drinks the liquid.

Tip

This is the ultimate messy nature play, so do it in clothes you don’t mind getting dirty and near a hose if possible. The stones help break the paper fibers quickly — if the paper is still chunky after shaking, add a little more water and shake again. Because mud and paper pulp tend to absorb liquids, sealing the dried sculpture with diluted plastic glue before painting saves acrylic paint and makes the finished piece stronger.

Shop the look

Everything on the table

Supplies that make sealing and painting the dried mud easier.

Looking for everything we use?

Every product linked on this blog lives in one sorted place, with what it is, where we used it, and why I’d buy it again.

Wander through the Glimmers →